Friday, May 30, 2008

Hiding individual objects in linked Revit files

To switch off individual elements in a linked RVT file, you could TAB select a particular object, then right click, and select 'Hide in View'. Very simple. The irony is that this works only if you have set the display setting of the RVT link "By Host View" or "Custom" in the VG dialog box.

image image

If you set the display setting of the RVT link "By Linked View" in the VG dialog box, then we don't get options in the "Hide in View" right click menu (see pic below)

image image

if you set the display setting of the RVT link to "Custom" in the VG dialog box and select a view for the linked view option, then we don't get options in the "Hide in View" too.

image image

However, when you set Linked View option in the basic tab to be None, then you can TAB select and hide individual objects.

image   image

Thursday, May 29, 2008

Filled Region not transparent

One of the nice features in Revit, is to be able to make a filled region (hatch) transparent or opaque. This option is in the type properties of the filled region.

image

However, one of our users complained that the filled region was NOT transparent even after setting this setting. See pic below. I was of the opinion that it was a display issue because of 'not enough memory'

image

However, after sometime, she realized that the view was in 'wireframe' mode and once she changed this to 'Hidden', the filled region behaved correctly. See pic below. Seems a bit counter intuitive (things should be transparent in wireframe and vice versa!) but ironically this works like this in both revit architecture 2008 and revit architecture 2009.

image

Wednesday, May 28, 2008

Zoom Sheet size

Because of this amazing zooming and panning capability in digital drawings, people loose track of the scale of the drawing (and the building!) Most of the times, this lack of scale understanding results in detailing / modeling more than necessary.

Revit has this rarely used command:

View > Zoom > Sheetsize (shortcut ZS in default installations)

This zooms the drawing window to match the print size based on the scale of the view. It is a good idea to check our model and the details based on this zoom factor. This habit also helps when we decide NOT to spend time to clean a wall joint properly, assuming that it may not look jarring in the sheet!

Tuesday, May 27, 2008

ADT or ACA 2009 and RAC 2009

I have not used ADT much since the 2005 version. Sadly, the 2005 version had some stuff even the RAC 2009 cannot match!  Anyway, I looked at ACA 2009 a bit and found these interesting things and some old stuff that would make Revit even better:

  • ADT 2009 has an automatic DWF publishing feature. Whenever you save or close the file, it creates a DWF! This might be very useful for project managers who want to check the progress but dont have an ADT license (or dont want to inadvertently screw up the dwg. )

image

  • At last, objects can have multiple leaders. When you remove these leaders, you can specify which leader to remove! (unlike in Revit)
  • Menu Browser: provides easy access to a variety of content, including commands and documents - we need this in Revit!
  • CUI: Ok...how long do I have to wait to get this in Revit! 
  • Wall endcaps!!! These were wonderful even in the 2005 version. Now, it just kicks ass!
  • Multiline tags - the ability to change the wrapping width of an attribute. In RAC, we need to edit the family to make such a change!
  • 64 Bit version! (More than ACA, RAC needs it. And needs it now!)
  • Repeating the same command (the good ol keyboard RETURN!)
  • Room, Door number integration.
  • User Profiles
It looks like ACA gets all new good features of Revit and Revit is very reluctant to borrow from ACA. Sadly, the argument that Revit is inherently better, and so does not need any features from other applications does not hold water.

Friday, May 23, 2008

Phasing and Rooms

Rooms by themselves dont have a phasing parameter that can be changed. If you move the bounding walls of a room to an existing phase, the room does not automatically go to that phase. Rooms take the phase of the view they were created on. So, to move a room to an existing phase, one has to copy the room and paste it in the view that assigned to an existing phase. Revit can have different rooms bound by the same walls (elements) as long as they are in views that are assigned to different phases.

Thursday, May 22, 2008

The Holy Grail of IFC export / imports

Prodded by a comment on the IFC export / import capabilities of ACA 2009 and RAC 2009, I exported the out of the box "c_condo_complex.rvt" file to IFC and imported it in ACA.

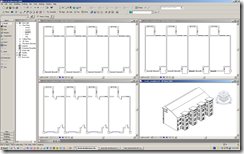
This is how it looks in RAC. (Three floor plans and iso view)

image 

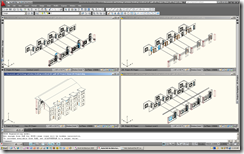
This is how it looks in ACA. (Three floor plans as iso views and a View dwg that has all these levels xrefed into them.)

image

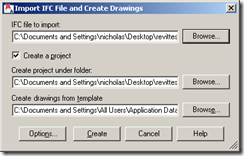
I used the "create new project" option.

image

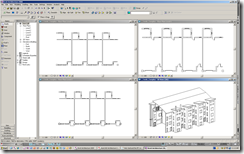
The results are NOT at all satisfactory. However, when I used the split walls and columns in Revit, I got this. I guess, this should work, if I want to give this IFC to my MEP consultants who are working with AutoCAD for MEP. It brought walls, windows, doors as ACA objects. (style names are IFCStyle1, IFCSTyle2, etc.)

image

If anybody has done this or use this function often, please enlighten me. Some issues:

  1. Some walls are missing.
  2. Roof and wall interaction is not handled properly.

Surprisingly, when I imported the same IFC file into RAC 2008, it looked like:

image

This result had similar issues like ACA. (same exterior walls missing, roof/wall bad improper interaction) It brought back same wall styles (as in RAC2009), etc. Which is great, but it seemed to happen only on the first floor level. Upper floor windows and doors have become in-place familes!!!

Wednesday, May 21, 2008

Revitizing CAD details

Before going any further:

The best detail is the one created in revit using Detail components and repeating details, revit text, leaders, etc. It is always better to ‘link’ the CAD detail and draw over this CAD detail to create a full blown revit detail and then unlink the CAD detail. If you cannot do this for some reason, think again. If you still cannot do this, then:

To do in CAD:

  • • You can skip the CAD part if you are going to fully explode the detail in Revit.
  • • Run ‘REVIT’ command (this custom command created using LISP, changes our standard DIM style; TEXT style, etc to be revit friendly. It tries to remove stacked text to regular text in DIMs, etc.)
  • • Delete unnecessary stuff. Purge.
  • • Bring objects closer to 0,0,0
  • • Set scale (this custom command created using LISP, sets DIMSCALE; LTSCALE; etc.)
  • • Use the DIM > update to update all the dimensions. This should remove all stacked text in Dimensions. (Revit 2009 does NOT understand stacked text yet!)
  • • Edit Mtext
  • • Unstack dims
  • • Mtext wrap width has to be set correctly in CAD. Because of the change in TEXT style, the width could be wrong – overlapping over drawing elements.
  • • All text within the mtext should have the same color. Revit creates separate text objects for each different colored texts.
  • • Save

To do in Revit:

  • • Open a new project > create a drafting view in a relevant scale and import the CAD detail. Don’t import any CAD detail directly into the project file. It is just good practice!
  • • Full Explode Imported CAD detail
  • • Line thickness should be fine, as long as, File menu > Export/Import settings > import lineweights is setup per your office standard.
  • clip_image002
  • • Revit creates separate linetypes for each layer in the CAD dwg.  You might have to swap them to revit linetypes by selecting the objects with the filter tool. It is easy, as long as the CAD file had followed a layer standard in CAD .
  • • Text style can look a bit different. You have to swap CAD text style names to Revit text styles. Again, this is easy, as long as the CAD file had followed a standard in CAD. All leaders are exploded. You have to select and delete them and create new leaders within Revit. This is painful. The new revit leaders need to point to correct objects!
  • • Hatch may not be present; Typically you want to select the CAD hatches and swap it with Revit filled regions.
  • • Dimensions come as exploded objects. It is better to create new ones in Revit. If line is off the axis, it is difficult to dimension in Revit.
  • • None of the exploded CAD objects should have any remnants of any CAD hatch patter, text style, dwg blocks (arrow heads...!) etc.
  • • Now these objects (or the drafting view) can be copied and pasted into your project.

As I said in the beginning, instead of going through all these steps, one could have easily created a full blown revit detail.

Keeping the details as CAD objects, and linking them in Revit is ok as long as

  1. you have both the licenses of AutoCAD and Revit
  2. You can live with CAD details and RVT details looking little bit different
  3. You are ok fighting with Revit to make it show the CAD hatches,  stacked text, etc properly.

Tuesday, May 20, 2008

Design options and linked Revit Files

I was at a seminar presented by Phil Read the other day. He mentioned about using linked revit files to create design options. This seems like a very good idea.

The problems we have had with Design Options is that once we choose an option over other, Revit deletes everything related to the deleted option. Design Options also had its own rules and complicated the main project file with lots of views, objects, etc. Creating new central files out of the project to make 4 or 5 design option seemed to work ok, as long as the main project file is NOT concurrently developed.

Linking a separate RVT file as a design option does not clutter the main project file. It allows the main project file to be developed concurrently. After finalizing the option, we can just convert the linked file into a Group! (The new Revit 2009 feature of the linked RVT file being able to define a room, is a great improvement!) We can keep the other design option, even after we select the favorite one!

May be one day Autodesk will do away with the Design Option?!

Monday, May 19, 2008

Revit startup script to swap INI file

Last week I had written a blog about a simple installation script for Revit. Somebody had asked about a startup script.  We use a script to launch Revit.  This allows us to change the Revit.ini (if need be), keyboardshortcuts file, add API extensions, etc in individual boxes as and when we want it, even after the initial installation. This helps people using laptops too, making the whole process transparent. (The laptop person has to borrow licenses to use Revit fully or should have a standalone license)

To set this up, we typically create two INI files: Revit.ini - points to network resources and Revit.loc - points to local resources. Both these files are copied to "C:\Program Files\Revit Architecture 2009\Program". The script checks for a network file. If it finds it, (= network is available) then Revit launches with REVIT.INI. If the script does not find the network, then it renames REVIT.INI to REVIT.NET and then renames REVIT.LOC to REVIT.INI and opens Revit.  While in the business of swapping INI files, we also run a BATCH file whenever Revit is launched. Currently this batch file is empty, but we could add commands as and when we need them!

Currently, when an user opens a RVT file directly from Windows explorer, the startup script for Revit does NOT run. We have not YET gone that far to link the RVT extension, etc to go through the batch file, but encourage users to open Revit first and then open the project within Revit. Here is the sample batch file, please use it at your own risk.

**********************

@echo off
if not exist "Z:\REVIT\Support\RAC2009Start.bat" goto RevitnoNet

:RevitNet
call Z:\REVIT\Support\RAC2009Start.bat
if exist "C:\Program Files\Revit Architecture 2009\Program\Revit.loc" goto Revit
rename "C:\Program Files\Revit Architecture 2009\Program\Revit.ini" Revit.loc
rename "C:\Program Files\Revit Architecture 2009\Program\Revit.net" Revit.ini
goto Revit

:RevitnoNet
@echo off
cls
@echo.
@echo.
@echo.
@echo.
@echo Please wait... Network connection is NOT detected...
@echo.
@echo.
@echo Please open 'Windows Explorer' to check if Z drive is present.
@echo.
@echo.
@echo If you are working on a laptop and off the network then,
@echo.
@echo.
pause
if not exist "Z:\REVIT\Support\RAC2009Start.bat" goto Revitlocal
goto RevitNet

:Revitlocal
if exist "C:\Program Files\Revit Architecture 2009\Program\Revit.net" goto Revit
rename "C:\Program Files\Revit Architecture 2009\Program\Revit.ini" Revit.net
rename "C:\Program Files\Revit Architecture 2009\Program\Revit.loc" Revit.ini
goto Revit

:Revit
rem sTART REVIT
"C:\Program Files\Revit Architecture 2009\Program\Revit.exe.lnk" %1
exit

**********************

Thursday, May 15, 2008

Frozen / Locked View ports

Someone reported a problem yesterday. Their legend view was locked in the sheet. It could not be selected / moved or deleted. The view didnt have any View Title, as is typical of all legends on sheets.

image

As per our standard, all legend views are supposed to use the "Viewport - No Title" type. However, in this sheet, the user has hidden the viewport using the right click menu > Hide in View > Elements option.

image

Clicking on the yellow light bulb at the lower left corner of the drawing area revealed this hidden element, and after unhidden, it allowed to be moved / deleted, etc.

Wednesday, May 14, 2008

Suppress leading 0 feet in dimension

This is a simple setting. However, a lot of people ask for this. Out of the box revit, show 0 feet in dimensions. For eg., it shows 9" as 0'-9". Some office dont show the leading 0 feet and would like revit to dimension as 9".

To change this setting for project wide:

Go to Settings menu > Project units and select Length and check 'suppress 0 feet'.  It is also a good idea to leave the rounding as 1/8" for architectural projects.

image .

To change this setting for only one dimension:

You have to create a new dimension type.

Select dimension, Go to its properties, click on 'edit/new' and then duplicate and then Units Format parameter at the bottom. You have to uncheck 'use project settings' option to 'suppress 0 feet'..

image

Tuesday, May 13, 2008

Revit Architecture to AutoCAD MEP export best practices

AutoCAD MEP works in levels and so, expects Revit to export the building by levels. This is just extra work for architects. If the MEP guys had Revit, architectus can just burn the rvt project in a CD and call it a day. However, we had to export to AutoCAD and these are my notes to export to autocad each floor as a separate 3D dwg file.

*****update 20080731 - instead of using the elevation, one can use plan views too... as long as the view range in plan extends only to the level below.

Also as Scott commented below one can use IFC export and import it in AutoCAD (version 2008 and above...) ******

1. Duplicate an elevation and crop the boundary to display only the first floor. (the horizontal crop boundary aligns with project Levels.

2. Go to a 3d View. Rename it MEP-First Floor; Go to View Menu > Orient > and select the cropped elevation. Use the middle mouse button + shift key (or the view cube) to rotate the view.

3. Switch off unwanted elements for MEP. Create a view template from this view. This view template can be used if the project has multiple floors.

4. To setup other floors, go to the cropped elevation. Stretch the crop boundary to encompass the next upper floor. Create a new 3D view and follow the steps outline above.

5. After you have all the floors setup in 3D with cropped boundaries, you can export them to AutoCAD as individual DWGs. (File menu > Export > CAD Formats)

6. You have to export the RVT objects as ACIS solids. This setting can be done in options command in the Export CAD format dialog box.
clip_image002

Autodesk has released a white paper on this with more information:

http://images.autodesk.com/adsk/files/whitepaper_-_effective_collaboration_exporting_acis_solids.pdf

Monday, May 12, 2008

Network Install script for Revit Architecture 2009 deployment

We have been using a script to install RAC 2009 for our custom install. I thought I would post it hoping it might be useful for others. (or others can find mistakes and make this better). Use this at your own risk.

  1. Do a typical Install of RAC2009 from DVD on one computer. Most of the steps outlined below are done in this computer.
  2. Copy all the relevant content from relevant folders in this computer to a network location like "z:\Revit\2009". (We copy
    imp templates; imp library from "C:\Documents and Settings\All Users\Application Data\Autodesk\RAC 2009";
    import / export settings, etc from "C:\Program Files\Revit Architecture 2009\Data"; ) etc.
  3. Copy and backup Revit.ini as revit.ini.default.
  4. Edit the revit.ini file directly (if you know what you are doing) or using the settings menu > options command, so that all the content is pointing to the network location. We prefer to leave the rendering library in individual boxes.; add paths in INI file to any other libraries as needed; Go to file menu in Revit and select shared parameters file, import/export settings, etc. Add paths, to API dlls etc. in the revit.ini. Open this revit.ini file and check if there is anything under [Partitions]. If there is, remove this section.
  5. Backup "C:\Program Files\Revit Architecture 2009\Program\keyboardshortcuts.txt" and then edit it using note pad to suit your office standards.
  6. You need to download separately "ArchitectureFamiliesImpENU.chm" and "TutorialsArchitectureImpENU.chm" from autodesk.
  7. When we create a network deployment, we set it to NOT install any content. Most of the content is accessed from the network. However, some content, settings is accessed from the local machine. So, we need to copy some files to every local machine (like Revit.ini; keyboardshortcuts.txt, etc.) after a typical network installation. We put all the files to be copied in one network folder, and run a script to do this.
  8. We copy all the customized content and settings from the computer where we had done the installation form the DVD to \\Ci-adv\apps\CADD\RVT2009\CI\copy . The following files / folders reside in this folder:
    "Data" folder has all contents of "C:\Program Files\Revit Architecture 2009\Data"
    "API" folder has all our DLLs, plugins, etc.
    "Training" folder has all the contents of "C:\Documents and Settings\All Users\Application Data\Autodesk\RAC 2009\Training"
    "Program" folder has the downloaded "ArchitectureFamiliesImpENU.chm" and "TutorialsArchitectureImpENU.chm"; the edited Revit.ini file and the edited keyboardshortcuts.txt file from "C:\Program Files\Revit Architecture 2009\Program"; and a dummy "patch.001" file. (this file is used to track future customizations, etc.)
    All these folders will be eventually copied to "C:\Program Files\Revit Architecture 2009" folder in individual boxes.
  9. The following is the edited version of the BATCH file we run to install. You can make changes as per your situation. Use this at your own risk. You can copy and paste the text below in a text file and save it with a BAT extension....you have to edit this to point to your server, etc. (shown in red color)

rem *************************

@echo off
rem location to our rac install link file, created by the network deployment wizard is here in the following example: \\Ci-adv\apps\CADD\RVT2009\ciuser32.lnk
rem this installation does NOT install any content. Most of the content reside on a network drive
echo install started... please wait
start "CI Revit Install" /wait \\Ci-adv\apps\CADD\RVT2009\AdminImage\Setup.exe /I \\Ci-adv\apps\CADD\RVT2009\AdminImage\ciuser32.ini
echo install started... please wait
echo After Revit Installation is complete,
pause
@echo on
REM rename out of the box files
rename "C:\Program Files\Revit Architecture 2009\Program\TutorialsArchitectureImpENU.chm" TutorialsArchitectureImpENU-default.chm
RENAME "C:\Program Files\Revit Architecture 2009\Program\Revit.ini" revit-default.ini
RENAME "C:\Program Files\Revit Architecture 2009\Program\KeyboardShortcuts.txt" KeyboardShortcuts-default.txt

Rem Now copy customized content from the "copy" folder; xcopy command with these options copies the folder and its subfolders;

xcopy "\\Ci-adv\apps\CADD\RVT2009\CI\copy" "C:\Program Files\Revit Architecture 2009" /i /s /c /g /h /f /y

@echo Revit 2009 Install completed!
pause

@echo off

@echo if you DONT want to install add-ons and plugins, press Cntrl-C; Else

rem We install RVT2009 Batch Print; worksharing etc that are available for subscription customers...

start "CI Revit Install2" /wait Y:\CADD\RVT2009\CI\batch_print_for_revit_2009_setup.exe
start "CI Revit Install3" /waitY:\CADD\RVT2009\CI\worksharing_monitor_for_revit_2009.exe
pause

exit

rem *******************

Thursday, May 8, 2008

Print Window in Revit and other print issues

Printing is not yet perfected in Revit.

  1. Sometimes, some objects, like hatches, tags, linked objects, etc will be missing from the print. The workaround is to print using Raster printing. This takes more time to print.
    image
  2. RAC 2008 and 2009 defaults to 'Fit to print' option. You have to always go to Print setup and change this to print at 100% everytime you open the project in revit.
  3. Sometimes, after a hard day's work, Revit would decide not to change the paper size (especially after printing the set in one size and if you try to change the sheet size). Sometimes, it previews ok, but wont print correctly. This seems to be a Windows problem, because we have seen this behavior in both Design Review (DWF) and Adobe Acrobat Reader (PDF).
  4. Print Window option needs improvement. The option currently available is "Visible portion of current window" which just means that revit will match the lower left corner of the sheet with the lower left corner of the drawing area of the view in Revit. So, if you choose a Letter size paper and if your project is big and the scale is small (1/16") then revit will print beyond the 'visible portion of the current view" starting from the lower left corner. And, if you choose a Letter size paper and if your project is big or small and the scale is big(1/2") then revit will print only portion of the 'visible portion of the current view" starting from the lower left corner. However,if you choose a Letter size paper and if you project is big/small and if you use the fit to scale option, then revit will print the 'visible portion of the current view". (hmm...that is why Revit is defaulting to this option!!!!?)
    image
  5. Print Window part 2: IF you want to print to scale an exact boundary to scale in a letter size (for a fax or something), you HAVE to crop the boundary of the view to suit your needs and then print the view with the option "current Window". You might want to duplicate the view, if you dont want to change the view. This is the suggested the workaround from Autodesk.
  6. Batch plot: You can use the "selected views and sheets" option to batch plot. Quite handy. However, you cannot preview the sheets after selecting this option. The workaround is to first do the print setup and preview with the option "current Window" and after you are satisfied, you can switch to "selected views and sheets" option
    image
  7. Batch Plot 2: When you select sheets/views, which batch plotting, unchecking the Show 'sheets' or 'views' option does NOT deselect the selected views. To select a new set of sheets/views, you have to "check none" and then go about selecting views or sheets. If you dont "check none" Revit would still go ahead and print supposedly unnecessary sheets / views.
  8. If you work on a big project and if you batch plot, 2GB RAM may not be sufficient. You will need 4GB RAM with 3GB switch turned on or a Windows 64 bit version OS with more than 4GB RAM.
  9. Autodesk has released a Batch Print utility for subscription customers. This opens a new instance of Revit and prints in the background. The memory issues seem to be lesser here. Autodesk has just released a RAC version of this software.

Tuesday, May 6, 2008

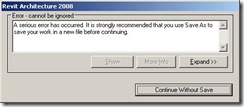
Serious Error Occured... text style corruption

Recently we got an error in only one of the Views and its dependent views in a project in RAC 2008. The error was serious (it said so!) and would not allow us to save to central, while in that view and was creating a lot of issues related to text type swapping, etc.

err while changing text type

After fiddling with the project for some time, I found that the error is because of a particular text style called 3/32" Arial 2. The error went away if we switch off the "text notes" in the visibility graphics dialog box for the problem view. We also found that whenever we try to change a text object to this type, the error occurred.

I thought upgrading the project to RAC 2009 might solve the problem. But that gave an error and would not upgrade.

2009err

To correct his, I created a new drafting view in new project and added two text notes in that. I created a new text type called 3/32" Arial 2 and assigned one of the notes to it. Then I imported this view into our project using File menu > Insert from file... > views command.

The error has not occurred since.

Monday, May 5, 2008

Hide View Title

Revit automatically adds View Titles for any views that are added to a sheet.

image

This works well for a lot of views. However, for legends / schedules, you may not prefer a view title. In such a case you can easily switch them off.

  1. Select the view port in sheet and go to the type selector.
    image
  2. If there are no Viewport types created without a view title, click on the properties button.
  3. Click on "Edit/New..." button, duplicate and name the new type as "Viewport - No Title)
    image
  4. Change the 'Show title' parameter to NO
  5. From here onwards, you could swap the type of the viewport to show or hide the view titles.

Friday, May 2, 2008

Best Practices for Large Projects in Revit

Some of the following tips are taken from many sites and forums. Some tips are evolved from our experience. Your project / results may vary.

  1. Use better hardware with 4 GB RAM (Windows 32 bit max)
  2. Use the 3 GB switch in 32 bit Windows
    image
  3. Use 64 bit windows if possible.
  4. Use 64 bit Revit, (not yet available)
  5. Giga bit network helps.
  6. Cleaner / faster hard drive helps. Defragment drives.
  7. If possible split project into two or more (like shell and fitout, etc.) smaller projects and link them.
  8. Use worksets to organize your project (furniture workset, etc.) You have options to
    1. Partially open worksets;
      image
    2. On / Off worksets - project wide;
    3. On / Off worksets - by individual views;
    4. Make a Workset not visible by default
      image
    5. Lock a workset
  9. Minimize CAD imports - both for backgrounds and details. Try to link them as much as possible rather than importing.
  10. Go to Tools menu > Review warnings periodically
  11. Customize Project Browser.
  12. Compact the model once a week for large projects
    image
  13. Use ‘Override Graphics’ sparingly - try use VG instead
    image
  14. Use view templates. RVT 2009 has very good options added to this.
  15. Don’t Over Constrain elements. In fact, in a large project, don't constrain the model at all. Restrict constrain uses only to Families.
  16. Don’t Over model (don’t put in 100 unnecessary 3D toilets or try to model the toilet paper holder in 3D). There are some revit families available in websites are notorious...there is one keyboard family floating around with all the keys modelled, etc....
  17. Don't use too many model lines or detail lines. Check if a well built family will work better in these circumstances.
  18. Finalize and remove Design Options if possible
  19. Check your view depth. A hidden line view with all the 7 floors showing below, will make the view really slow to pan, zoom, refresh.
  20. Frequently Window menu > 'close hidden windows’ often. It is best to create a shortcut in the file: "C:\Program Files\Revit Architecture 2009\Program\KeyboardShortcuts.txt" for this command.
  21. Use groups sparingly. Don’t use Groups comprised of walls at various levels and in different circumstances. (wall joins, etc.)
  22. Make components instead of groups or in-place families. If an in-place family is to be duplicated, it is better created as a regular family.
  23. Purge unused elements. (File menu > Purge unused...)
  24. Reduce fill patterns, line styles - exploding DWG files create enormous amounts of line types, text styles, fill patterns, etc.
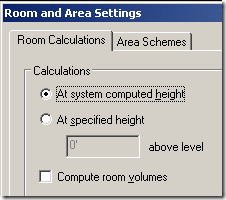
  25. Uncheck “compute room volume” option in Settings menu > Room and Area Settings...
    image
  26. Create local files every morning. This reduces the time to 'reload latest' after opening a Local file every morning. However, "copying a central file and renaming it to create a new local file" is not recommended by Autodesk. Copying of databases can create errors.
  27. Turn off shadows / shading in views.
  28. Delete unused 3D views from sheet / views
  29. Audit once a week - if the project spits errors once in a while.
  30. Clean linked DWG files: layers / blocks / etc - before bringing into Revit; objects not too far from ORIGIN;
  31. Don’t run more applications than are critical (itunes, winamp!)
  32. Use Worksharing monitor for Revit (available for subscription customers only)
  33. Use batch printing utility to print (available for subscription customers only)
  34. Update the Video Card Driver - there are lots of time, a view drag is attributed to the video card driver.
  35. Use of the warped slab tool kills performance and make your project a drag.
  36. Cylindrical / circular elements need more memory to render / refresh.